Trail Signage for Mountain Bike Trails
For ski areas members, please click here to access art for the signage below.
Below are examples of trail signs that you may find at bike parks at ski areas. There may be other variations of these signs that areas have chosen to use. Remember, these signs indicate the difficulty of the trails at the area.
Be careful though, the easiest slope at one area may be considered a more difficult slope at another. If you are unsure about which trail is right for you, take the green trails until you are familiar with the mountain and the trail network. The wrong choice could send you down a trail that you aren't ready for. With any trail, be sure to check out the trail and features before you ride them, start small and work your way up.
The green circle, blue square and black diamond indicate different degrees of difficulty, relative to the trails at that area.
- Green Circle: Easier
- Blue Square: More Difficult
- Black Diamond: Most Difficult
- Double-Black Diamond: Extremely Difficult, Use Extra Caution
Technical Trails
Technical Trails are often relatively narrow and contain features and characteristics found naturally occurring on the area property, it’s slopes, trails, and terrain. Technical Trails may contain roots, gravel, rocks, logs, water crossings, jumps, drops and other natural characteristics and obstacles found in the natural environment, and may also include some man-made obstacles and bridges. Technical Trails may also incorporate Freeride Trail features and designs (see below). Trails may be built by hand and/or machine, and look largely natural. Technical Trails may be designated for one-way or bi-directional travel. Technical Trails may be accessed via chairlift or from other trails within or outside the ski area property. Trails in this category may be shared with other types of trail users such as hikers and equestrians.
Technical Trails are identified by their degree of difficulty symbol – green circle, blue square, single black diamond, or double black diamonds. Additional enhancements to these symbols may include horizontal lines, vertical lines, or the use of the letters “DH” or “XC” (see examples following).


Freeride Trails
Freeride Trails are often wider than Technical Trails, containing constructed enhanced/modified terrain, obstacles, and features such as jumps, berms, banks, bridges, drops, etc. created from dirt, wood or other materials. Freeride Trails may also incorporate Technical Trail features and designs. Freeride Trails may be hand- and/or machine-built and are most commonly designed to be ridden downhill. Freeride Trails may be accessed via chairlifts, other types of transportation, or from other trails from within or outside of the ski area property that a rider may pedal up.
Freeride Trails are distinguished from Technical Trails by the use of the orange oval with their difficulty symbol – green circle, blue square, single black diamond, or double black diamonds inside of the orange oval (see examples following).


Other Trails Signs
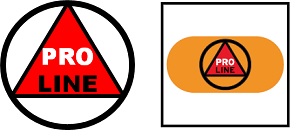
Beyond Expert or Professional-Level Trails are those requiring professional competition-level skills. Before using these trails, riders may be required to sign specific releases or attend required training before being allowed onto these trails. Consult the area before attempting to use these trails for the first time.

Skill Development Areas or Skills Parks are specifically designed to provide riders the opportunity to learn and develop new skills away from the trail environment. The features and obstacles in a skills park may or may not directly reflect the size or type of feature or obstacle the rider may encounter on all of the trails in the bike park. Remember, it is your responsibility to inspect trails and feature before attempting.
